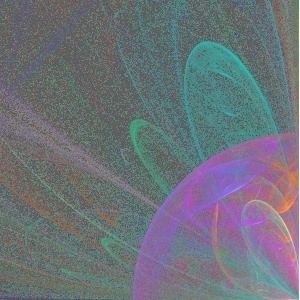
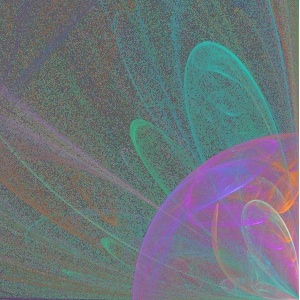
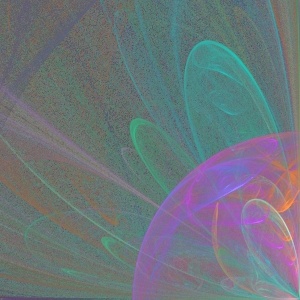
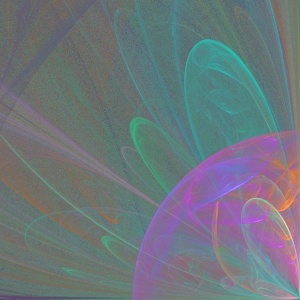
Effect of Render Quality Setting
Quality has a very strong effect on image quality as shown below.Higher quality looks better, but there are diminishing returns on very high quality.
Rendering time is proportional to the quality setting.
Effect of Render Quality Setting - Density Estimation off
Density estimation handles the inherent rendering noise produced by the Flame algorithm. With low quality you can see that the render has not hit many of the pixels. The default dark gray background color shows through when the pixel histogram count (number of hits) is zero.
Note that at very high quality, the noise disappears and the image quality is comparable to when density estimation is applied. But this takes a long rendering time to achieve this noise reduction. Density estimation gives a better looking image at low quality settings.
With some fractals, where the background dominates and there is a gradual tapering off of the hit density, density estimation can actually add artifacts that might be objectionable.Density Estimation can be turned off using the Triangle Editor.
Select the Flam3 tab, then set Estimator Radius to 0.
Set it to non-zero to turn it back on.
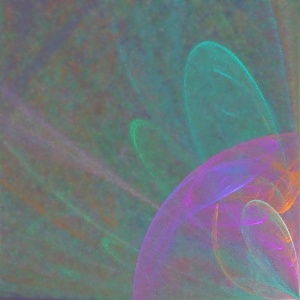
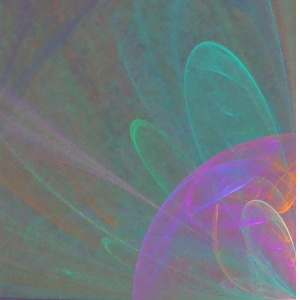
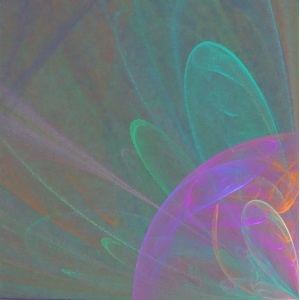
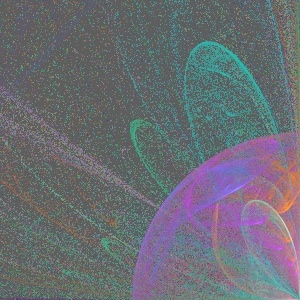
Tough Case - Density Estimation Artifacts
This image series shows a fractal where the light green background dominates the image and where there is not a clean cutoff between the high density fractal body and the background. Each little bubble is a single histogram hit. The density estimation algorithm spreads it from a single pixel into a bubble.Gamma Threshold to the Rescue!
Gamma Threshold is a parameter that can hide density estimation artifacts. Its default value is 0.01. The useful range for the parameter is from 0.0 to 0.2 or so. It can have a dramatic effect on the image appearance for fractals with a lot of low density area.
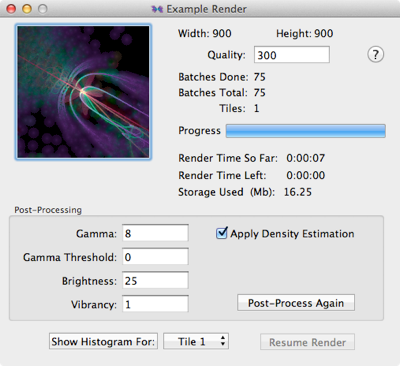
If you Save Render State when you render to File, once the image is rendered, you may quickly tweak the Gamma Threshold value.When the render state is saved to disk, this window opens. You can change the Gamma Threshold value here and click the
Post-Process Again button. Since you have the entire render state, post processing again here is very fast.
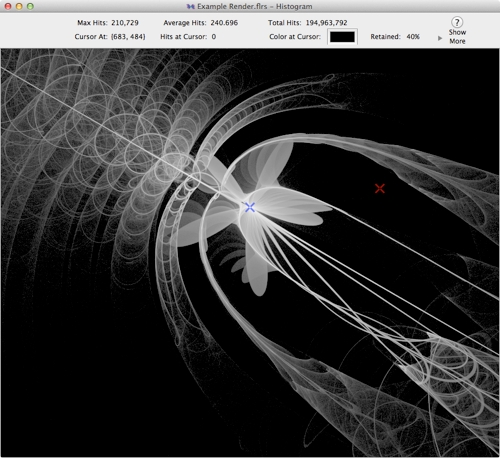
Histogram View
If you click on the
Show Histogram button, you get to see the actual all-important histogram. The histogram is built by the main rendering loop. The histogram is converted to the final image by the post processing phase of the renderer.
What it shows in the black areas are low density areas where the histogram has close to zero or zero hits. If you click with the mouse in the black areas, the hits on a particular pixel is shown in the information bar. The spot you clicked on is shown with a red X. The blue X is the spot of the histogram with the maximum hits.
Effect of Gamma Threshold
Density Estimation Off - No Gamma Threshold
Some artists feel that Gamma Threshold indiscriminately wipes out low density areas. A Gamma Threshold value of zero turns off its side effects. An alternative way is to turn off Density Estimation.
Here density estimation is turned off. You can see the individual histogram hits are just a cloud of darker pixels.Super Sampling and No Density Estimation - No Gamma Threshold
Finally, we can take a lower quality image without density estimation, and make an oversized image. Next that bigger image is reduced in size.
For example, below are a 2X super sampled image and a 4X super sampled image, both shown after their image size was reduced with a photo editor like Pixelmator or Photoshop.
The image reduction step does soften the image a bit. A Sharpening Filter can be applied to remove the softening that super sampling does.
Q 100, No Density Estimation, 2X Supersampling
Q 100, No Density Estimation, 4X Supersampling