Fractal Architect 3 Help Index
Applies to:FA 3DFA 3D-AV
See also: Keyframe Window Video Animations
See also: Audio/Video Utilities
Motion blur is only used for video animation. It is done by sub-frame interpolation where animation interpolation is done multiple times for each frame.
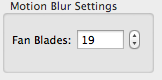
The motion blur parameter (the number of sub-frames) is called Fan Blades. Its value is the number of sub-frame interpolations per video frame.
When the Fan Blades setting is equal to 1, this means that no motion blur is produced. The maximum number of Fan blades is equal to the number of render batches used by the render. Larger images and higher render quality produce more render batches. The default value for the Fan blades parameter is always equal to the maximum number possible.
Larger image frames require more rendering, so the maximum amount of motion blur is greater.
For example, a render image size of 640 X 480 pixels (480p SD) at render quality 200 has maximum Fan blades of 19.
When the frame size is raised to 720p HD (1280X720), the maximum Fan blades of 57.


Rendering videos can take a long time.
Consider that a 1 minute video (at 30 frames/sec) has 1,800 individual video frames, each which is a different rendered fractal image. If it takes 10 secs to render each video frame using the CPU, the time to render a full minute of video will be 5 hours.
So clearly GPU acceleration makes sense here, if your Mac has that capability. A Macbook Pro with a separate discrete GPU might be able to render the video frames 4X times faster when you select to render with the GPU. That still takes 1 hour and 15 minutes to render a minute long video at 30 frames per second.
You can render a video in chunks so that your Mac is not tied up with rendering all of the time. The recommended way to render a long video is to first render out each video frame as its own image file. Then as a second step you convert the image file sequence to a video.
As an alternative approach, you can render separate video segments (each segment is its own video clip) and then later splice the videos together.
When you are at a place in the App where you can create a fractal animation, you can either:
| Pros | Cons | |
|---|---|---|
| Make Image Sequence | Can inspect each frame. | Requires later conversion to video step |
| Memory efficient. | Image sequence disk storage requirement | |
| Can recover from app crash. | ||
| Make Video | Simpler | Memory inefficient - all frames in memory |
| One Step | Not usable for long videos - 60 video frames at most | |
| All rendering work lost if run out of memory | ||
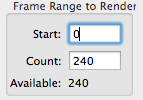
When you first open the Render video dialog, the entire render range is selected to be rendered. You might want to break up the render into 30 frame chunks.
Note the Available frame count is 240 (which is the total un-narrowed frame count).
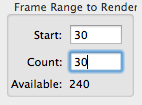
This frame range will render just the first 30 frames.
Here we set the frame Count value to 30 and the Start value is 0 - where 0 represents the first frame.
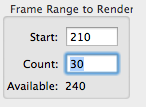
This frame range will render just the last 30 frames.
Here we set the frame Count value to 30 and the Start value is 210.
Note: Available value of 240 minus 30 equals 210.
Steps to Render to an Image file sequence:
Use: File > Convert Image Sequence to Movie
Steps to Render to a video:
Use: File > Splice Videos Together
This will combine two video segments together into a new longer video.
Video Bitrate is the number of bits per second that the video uses.
The video size is directly proportional to this video bit rate.
Higher bit rates represent lower compression than higher bit rates.
Because of the video memory storage requirements, different mediums have different typical video bitrates. For Web sites, like YouTube or Vimeo, you should consult their documentation to see the appropriate video bitrates for the video frame sizes. Web usage is optimized for reasonable download times.
You choose the target device type first, then adjust the slider in the app to set the effective video bit rate.
Note: the only difference between the 3 device types is the amount of video compression applied. The output file formats are identical. To burn a DVD or Blue Ray disk, you can use iDVD (part of the iLife suite from Apple).