Fractal Architect 5 Help Index
Direct to Video Rendering Dialog
Applies to:FA 5
This dialog allows you to create a video using the settings that you choose.
See also: Quick-Spin Animation
See also: Cross Breeder Animation
See also: Movie Render State Documents
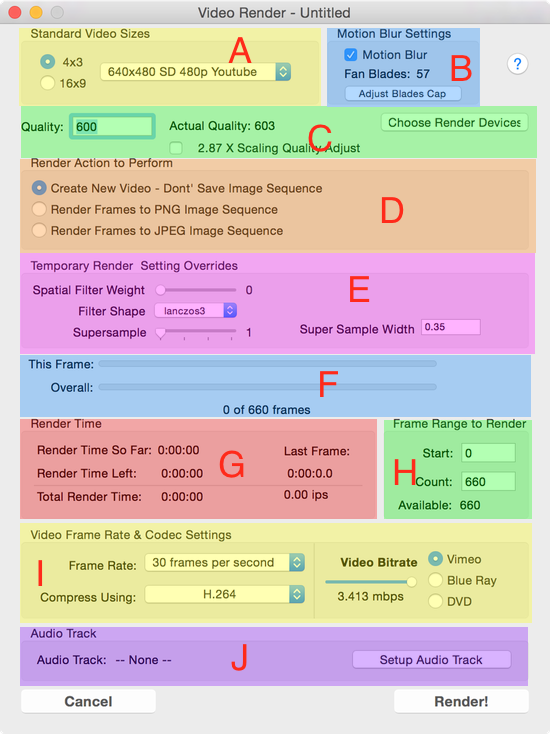
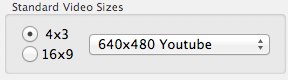
A. Standard Video Sizes
B. Motion Blur Settings
C. Quality
D. Render Action to Perform
E. Temporary Render Setting Overrides
F. Progress
G. Render Time
H. Frame Range to Render
I. Video Frame Rate & Codec Settings
J. Audio Track Setup
How to Render a Video
- First choose the size of the video from the size lists for either 4X3 or 16X9 aspect ratio.
- Next choose the rendering quality, quality scaling adjustment, and other renderer settings.
- Next choose the size of the video frame rate and codec.
- Finally press the Render! button, choose a place to save the video file, and wait for your render to finish.
When it is finished, a Video player will open with your new movie.
Standard Video Sizes
First choose the size of the video from the size lists for either 4X3 or 16X9 aspect ratio.
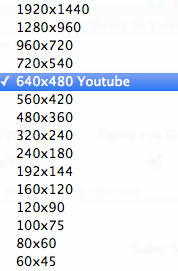
Standard video sizes - 4X3 aspect ratio
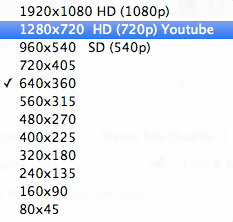
Standard video sizes - 16x9 aspect ratio
Motion Blur Settings
- Motion Blur On/Off
- Shows number of sub-frame interpolations to render which adds motion blur.
Value = 1 has no motion blur.
Quality Settings
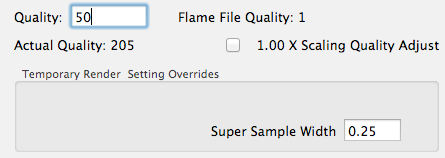
- Quality
- Renderer Quality - better images with higher quality, but takes longer to render.
Small videos can use a quality of 50 or so. - Quality Scaling Adjustment
- If you have used viewport scaling (zooming) to zoom into the image, this is an optional quality multiplier.
- Choose Render Device
- Allows you to switch render devices for example CPU to GPU. (Changes the render device preference setting being used for the whole app.)
Render Action to Perform
- Start
- First frame to render
- Count
- Number of frames to render.
- Render JPEG Image Files
- Render JPEG image file sequence to a folder - one file per video frame
Temporary Render Setting Overrides
A handful of rendering related settings can be locally overridden here. Which ones are available for tweaking depends on the actual renderer used.
- Super Sample Width (OpenCL & CUDA renderers)
- Controls anti-aliasing.
- Spatial Filter (Flam3)
- Supersample reduction filter. Affects how multiple pixel values are reduced to one.
- Supersample (Flam3)
- Render to an integral multiple of the image size. The final image is reduced back to the target image size.
Render Time
Shows render time so far and the expected render time remaining. Render time estimates are updated based on the actual render times for the current frame. Since different frame’s rendering time varies based on the fractal, these are estimated times at best.
- Render Time So Far
- Shows the time spent in the main iterative rendering loop.
- Render Time Left
- Shows the render time left in the main rendering loop.
- Total Render Time
- Shows the estimated total render time.
- Last Frame Render Time
- Shows the render time for the last frame.
- Last Frame Iterations per Second
- Shows the renderer performance for last frame in millions of iterations per second.
Frame Range to Render
- Start
- First frame to render
- Count
- Number of frames to render.
Video Frame Rate and Codec Settings

Video Frame rates (frames per second)

Video Codecs


Audio Track
You can add an optional audio track to the video.
Setup Audio Track Panel
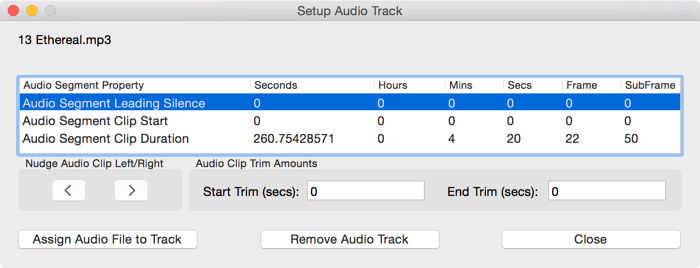
Audio Clip Properties Table
The actual audio file is not touched, this only determines what portion of the audio clip is used and when it is used in the video.
- Audio Segment Leading Silence
- Time duration of added lead-in silence.
- (measures added silence at the beginning of a video)
- Audio Segment Clip Start
- Time duration from start of audio clip to be clipped
- (for removing lead-in silence or noise)
- (same as start trim)
- Audio Segment Clip Duration
- Time duration for the audio clip to be played.
Setup Audio Track Buttons
- < Nudge Clip Left
- Audio clip will begin playing sooner. (affects leading silence)
- > Nudge Clip Right
- Audio clip will begin playing later. (affects leading silence)
- Start Trim
- Amount the audio clip is to be trimmed at its start.
- End Trim
- Amount the audio clip is to be trimmed at its end.
- (played duration = clip duration - start trim - end trim)
- Assign Audio File To Track
- Lets you select an Audio file to use on the audio track.
- Remove Audio Track
- Removes the Audio Track from the video.
High Quality Video shown in QuickTime X Player
