Fractal Architect 3 Help Index
![]()
Applies to:FAFA 3DFA 3D-AV
References: Render to File and Render State Panels
Related Tutorial: Basic Rendering Tutorial
Article: Advanced Rendering - Pausing, Resuming, & Recharging Your Images
Rendering an image saves the image to a file type of your choice, so it can be used outside of Fractal Architect 2.
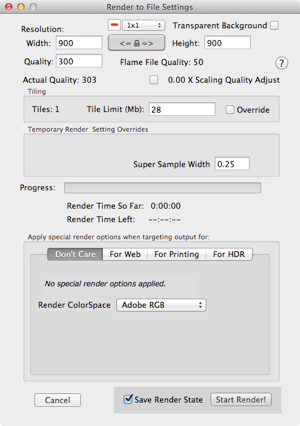
Use the menu item File > Render Image to File… to open the Image rendering window.
Set up the render as explained in the Basic Rendering tutorial.
Next, start rendering.
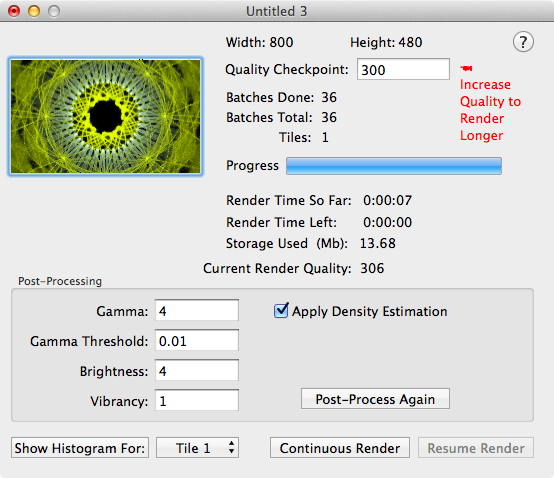
When the render finishes the Render State window will open. At this point, the progress bar will be full, showing that the render is complete.
You have 3 options in the Render State window:
Click on the Quality text field and type in a higher quality value. This will improve the resolution, or sharpness, of the finished image. Important: press the Enter key after changing the quality,or your new quality value won’t be saved!
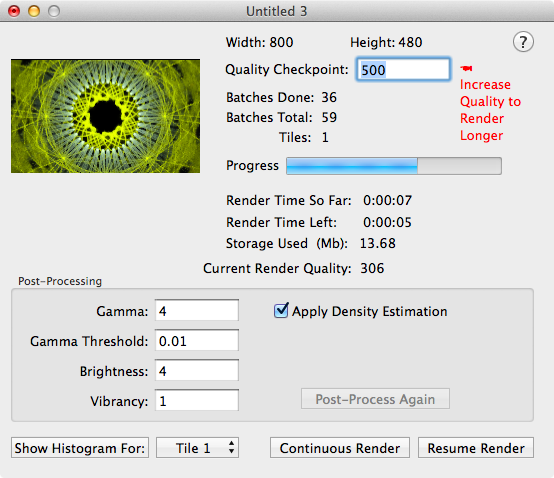
The Progress Bar will update for the new render quality and the Resume Render button will be re-enabled. Now you can resume the render.
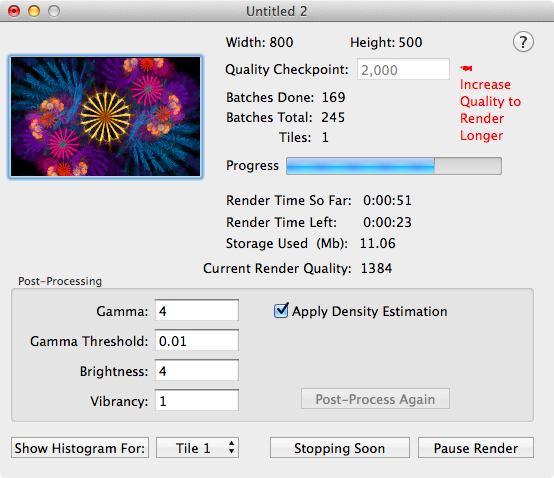
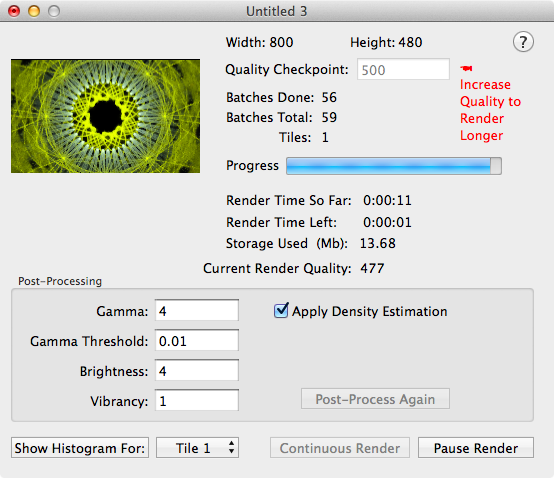
In the example images, the render quality was increased from 300 to 500. Note the Progress Bar and Estimated Render Time Left that reflect this new quality setting.
After the render quality reaches the new target, the fractal image will be shown in a doubled paned window. The title bar will show the before and after quality of the two images. You can move the vertical separator around to see how the increase in quality has improved the image.
If you still want more render quality, just type in a higher Quality Checkpoint value and resume rendering again.

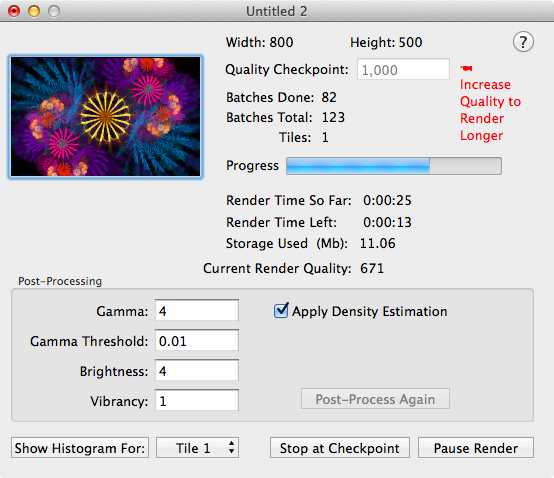
An alternative approach to getting higher quality images is to choose Continuous Rendering.
Continuous rendering renders continuously from one Quality checkpoint to the next. The Quality checkpoints are at: 500, 1000, 2000, 3000, …
At each checkpoint, the fractal image is updated and the prior quality/current quality images are show in a double paned window. The left pane is the higher quality rendering and the right pane is the lower quality rendering.
The render never stops until you tell it to and then it will stop at the next checkpoint.
Click on Continuous Render button to begin continuous rendering.
After clicking on the Continuous Render button, its title will change to: Stop at Checkpoint.
Click on the Stop at Checkpoint button to signal the continuous render to stop.
After clicking on Stop at Checkpoint button, it will change its title to: Stopping Soon. When the quality reaches the next checkpoint level, the render will stop.
When you have completed a render state, post-processing can be re-run with different processing parameters. Post-processing is very fast, and can make a big difference in the final image quality.
See Post Processing parameters for a description of what each processing parameter does.
See here for a discussion on tweaking the parameters.
While the image is being rendered, it’s possible to pause (not cancel) the render. At this point, the render state is saved to a file which can be opened in the future when you want to resume rendering.
To pause the render, click the Pause Render button. The render state is saved and the Render State window opens. (The Render to File window will close.)
You can choose to Resume the render at any point, just like in the Basic Rendering tutorial.