Fractal Architect 3 Help Index
Applies to:FAFA 3DFA 3D-AV
Fractal images can make great Desktop background images. This tutorial shows you how to make them.
Go to the Fractal Architect’s Welcome Screen window. (One way is to use the menu: Window > Welcome to Fractal Architect. Or use the Command- ~ (Command+tilde) key combination to quickly cycle through the application’s windows.)
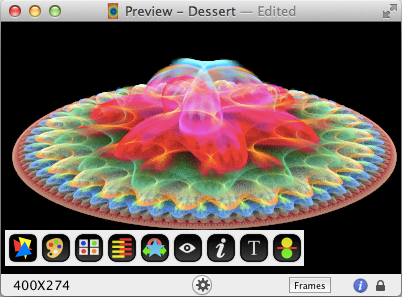
Click on the Gallery tab. Double click on one of the thumbnail images to open it in a Preview window.

To create an image to fit your display’s background, we need the size of that background. We can get that from Apple’s System Preferences.
On the far left corner of the Application menu is an Apple shaped icon. Click on it and select System Preferences…. We want to open the Displays icon (on the second row of icons).
The screen resolution we want is the largest one shown in the Resolutions list under the Displays tab. The width in pixels is the first number. The height in pixels is the second number. For example, my laptop has a resolution of 1440 x 900. Its width is 1440 pixels and its height is 900 pixels.
Close the System Preferences application.
The Gallery fractal images are all near 4:3 or 1.3333 aspect ratio. The aspect ratio is defined to be width divided by height. Using my laptop as an example, its display aspect ratio is 16:10 or 1.6 (1440 / 900). Its a lot wider than the fractal image is. We need to crop the image to get the right aspect ratio for the rendered background image.
The preview window is just a “view” of the fractal. Think of it like a little virtual camera pointed at the fractal image. Like a real camera, you can move the camera around relative to the fractal image.
In preparation for cropping the fractal image, lets zoom out the camera’s viewpoint so we can see what surrounds the current view. We could crop the image as is, but often you want to just make the image a different aspect ratio, without losing part of the image (from the crop).

In the middle of the Preview window’s status bar is a button with a little upside triangle. Click on it to open the Editor tray.
Now click the Zoom edit mode button, which has this icon:  .
.
Click the mouse inside the fractal image and drag it towards the little red dot (the zoom center).
With a multi-touch trackpad, use the pinch out gesture to zoom out. (Pinching in zooms in!)
Cropping the Image
Click the crop edit mode button, which has this icon:  .
.
We need to set the crop aspect ratio to be the same as our display’s aspect ratio. On my laptop that is 16x10 or 1.6. Your display is likely different.

Open the aspect ratio pop-up menu button.
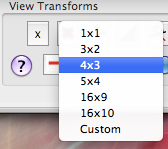
If your display is a standard aspect ratio (and you know which one) just select it. Otherwise you need to select Custom to open the Aspect ratio Assistant.
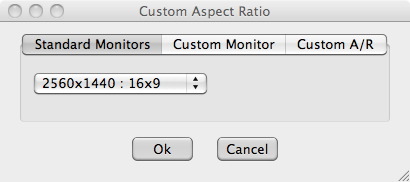
Under the Standard Monitors tab is a popu-op menu button. Click it and see if your monitor resolution is listed there. If so, select that aspect ratio, then click the OK button.
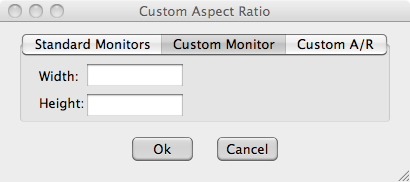
If not, click open the Custom Monitor tab, enter your monitor’s width and height, then hit the OK button.
Verify the aspect ratio lock button is in the locked state:. If not click it to lock the aspect ratio.
Using mouse or trackpad, click and drag the mouse to open the crop rectangle. You can further adjust it by clicking on the crop rectangle’s blue circle handles and dragging them. You can move the whole rectangle around by clicking in the middle of the crop rectangle and dragging the whole rectangle around. (A hand cursor will be visible.)
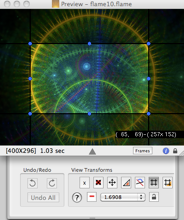
If the crop rectangle is in a good position, press the Return key to perform the actual fractal crop. If its not, press the Escape (labeled Esc) key to cancel the crop.
If you are unhappy with the crop, click the Undo button (or press Command-Z) to undo the crop.
Use the menu item File -> Render Image to File… to open the Image rendering dialog.
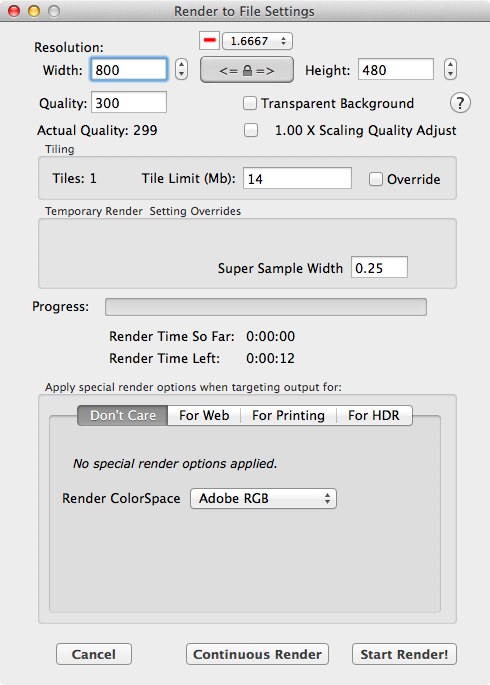
The aspect ratio pop-up menu button should already show the value of the crop aspect ratio you selected earlier.
The aspect ratio lock button (between the width and height fields) should also show the locked state. Enter the display’s width into the width field; note the height field should adjust automatically to maintain the target aspect ratio.
You can change the aspect ratio of the rendered image too. Note: aspect ratio changes made here are not saved to the fractal definition file - only the rendered image is affected.
The Quality text field is very important. The time to render an image is linearly proportional to the image quality set here. Quality here is a quantitative measure of the number of times each pixel in the image is recalculated using random initial points. The output image’s apparent quality (its clarity and lack of haziness) is very dependent on the quality setting. Some images seem to benefit from higher quality settings than others. You might try to render the same image at both a quality of 300 and 1000, to see if there is significant improvement to the rendered image.
Fractal Architect allows you to set the colorspace for the rendered image. The colorspace has a big impact on the apparent color saturation of the final image. For information on the topic of colorspaces, see:How are ColorSpaces used by Fractal Architect?. My personal favorite is: AdobeRGB
Just press the Start Render! button. You will be asked the output file’s location and name. For display background images, these should preferablly go into your personal Pictures directory.
When the render is finished, the output image file will open in Fractal Architect so you can inspect it and rerender again if it needs a higher quality setting, for instance.
Right mouse click on the desktop background, and select the menu item Change Desktop Background…. Select the Pictures folder from the list on the left side of the dialog. Set the background property to Fill Screen. Scroll through the thumbnails of the images found in your Pictures directory. Click on your fractal’s thumbnail image.
Thats it!